Today another episode in my seldom-updated series about building a home aluminum foundry.
The technique I use for casting aluminum is called “green sand” casting not because the sand is green (though the sand I use is in fact slightly olive coloured) but because the sand is moistened with water and clay rather than oil. I made the sand myself; it’s a mixture of about ten parts olivine sand to one part finely powdered bentonite clay, and then “tempered” with water until it feels right. (Use a spray bottle set to a fine mist and stir the sand as you temper it.) It should feel like perfect sand castle building material: wet enough to hold its shape but not so wet that you can squeeze water out of it. If you can make a “snowball” of sand with a fist and break it cleanly in half, that’s probably good.
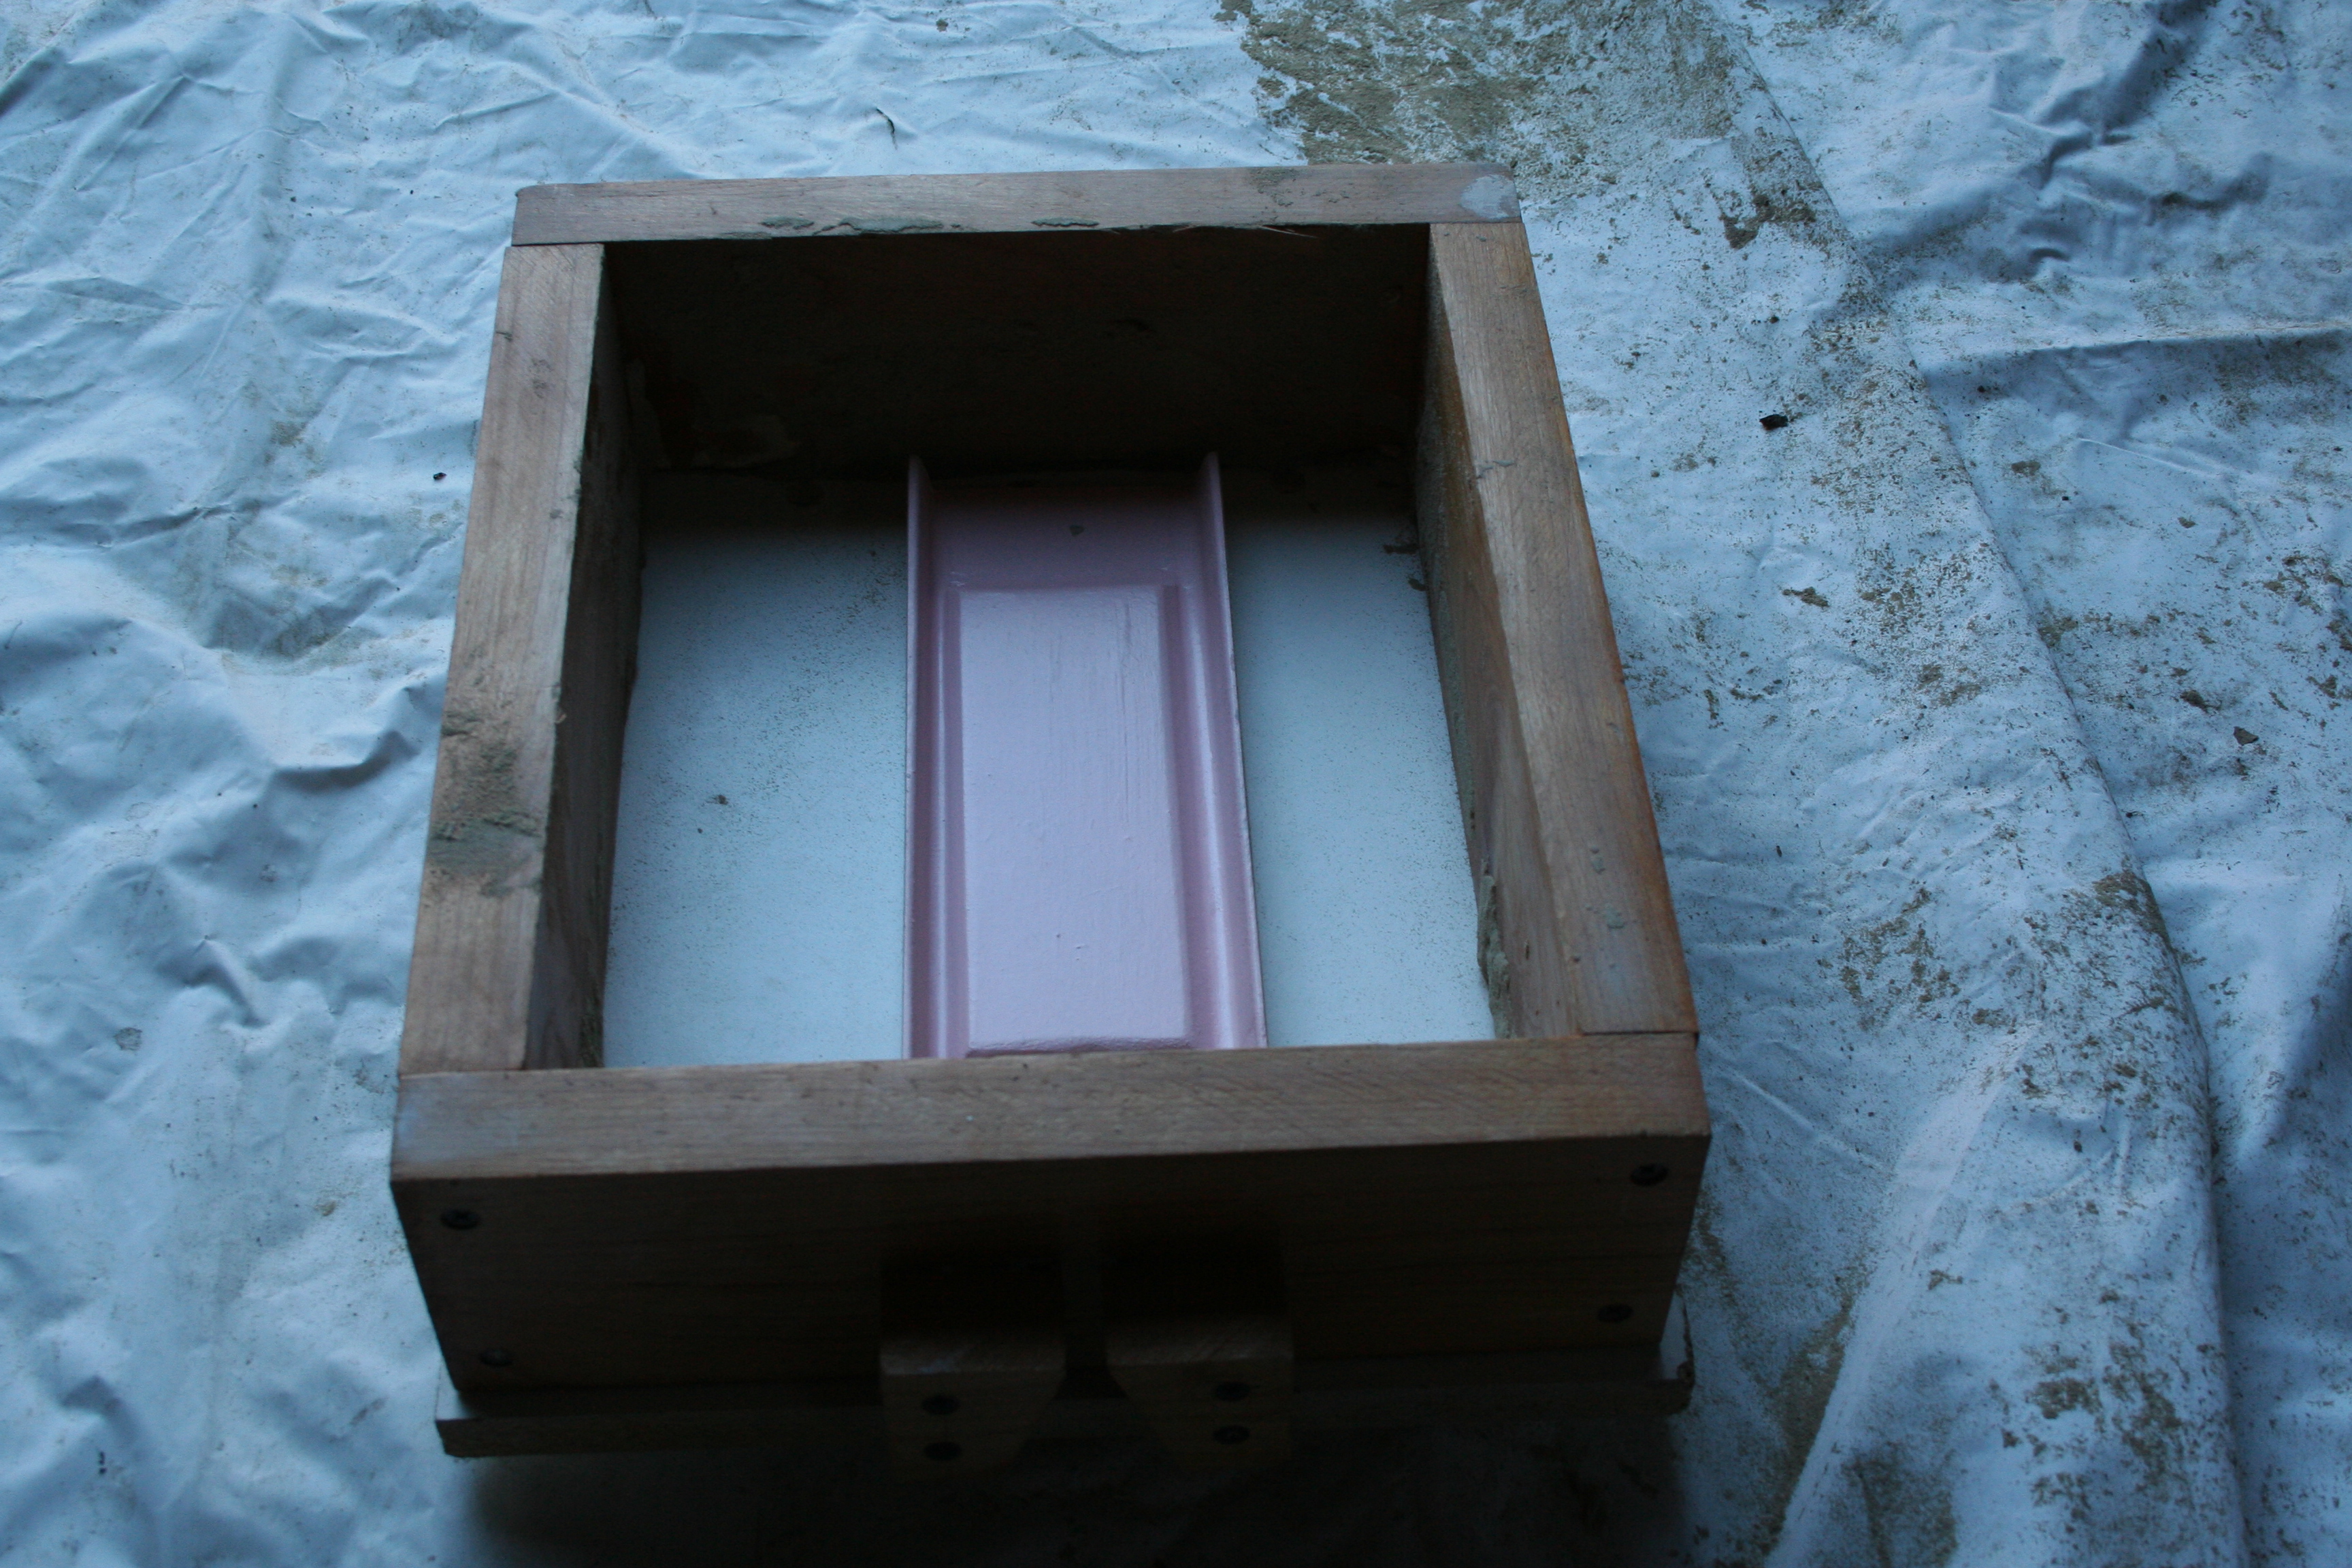
The mold is made in a topless, bottomless two-part wooden box called a “flask”; the top part is the “cope” and the bottom is the “drag”. The pattern I am molding here is a one-piece pattern. I start by making a pattern out of wood and painting it with glossy spray paint so that damp sand will not stick to it. The drag goes upside down on a flat board with the pattern upside down inside the drag: (Click on any photo for a larger version.)
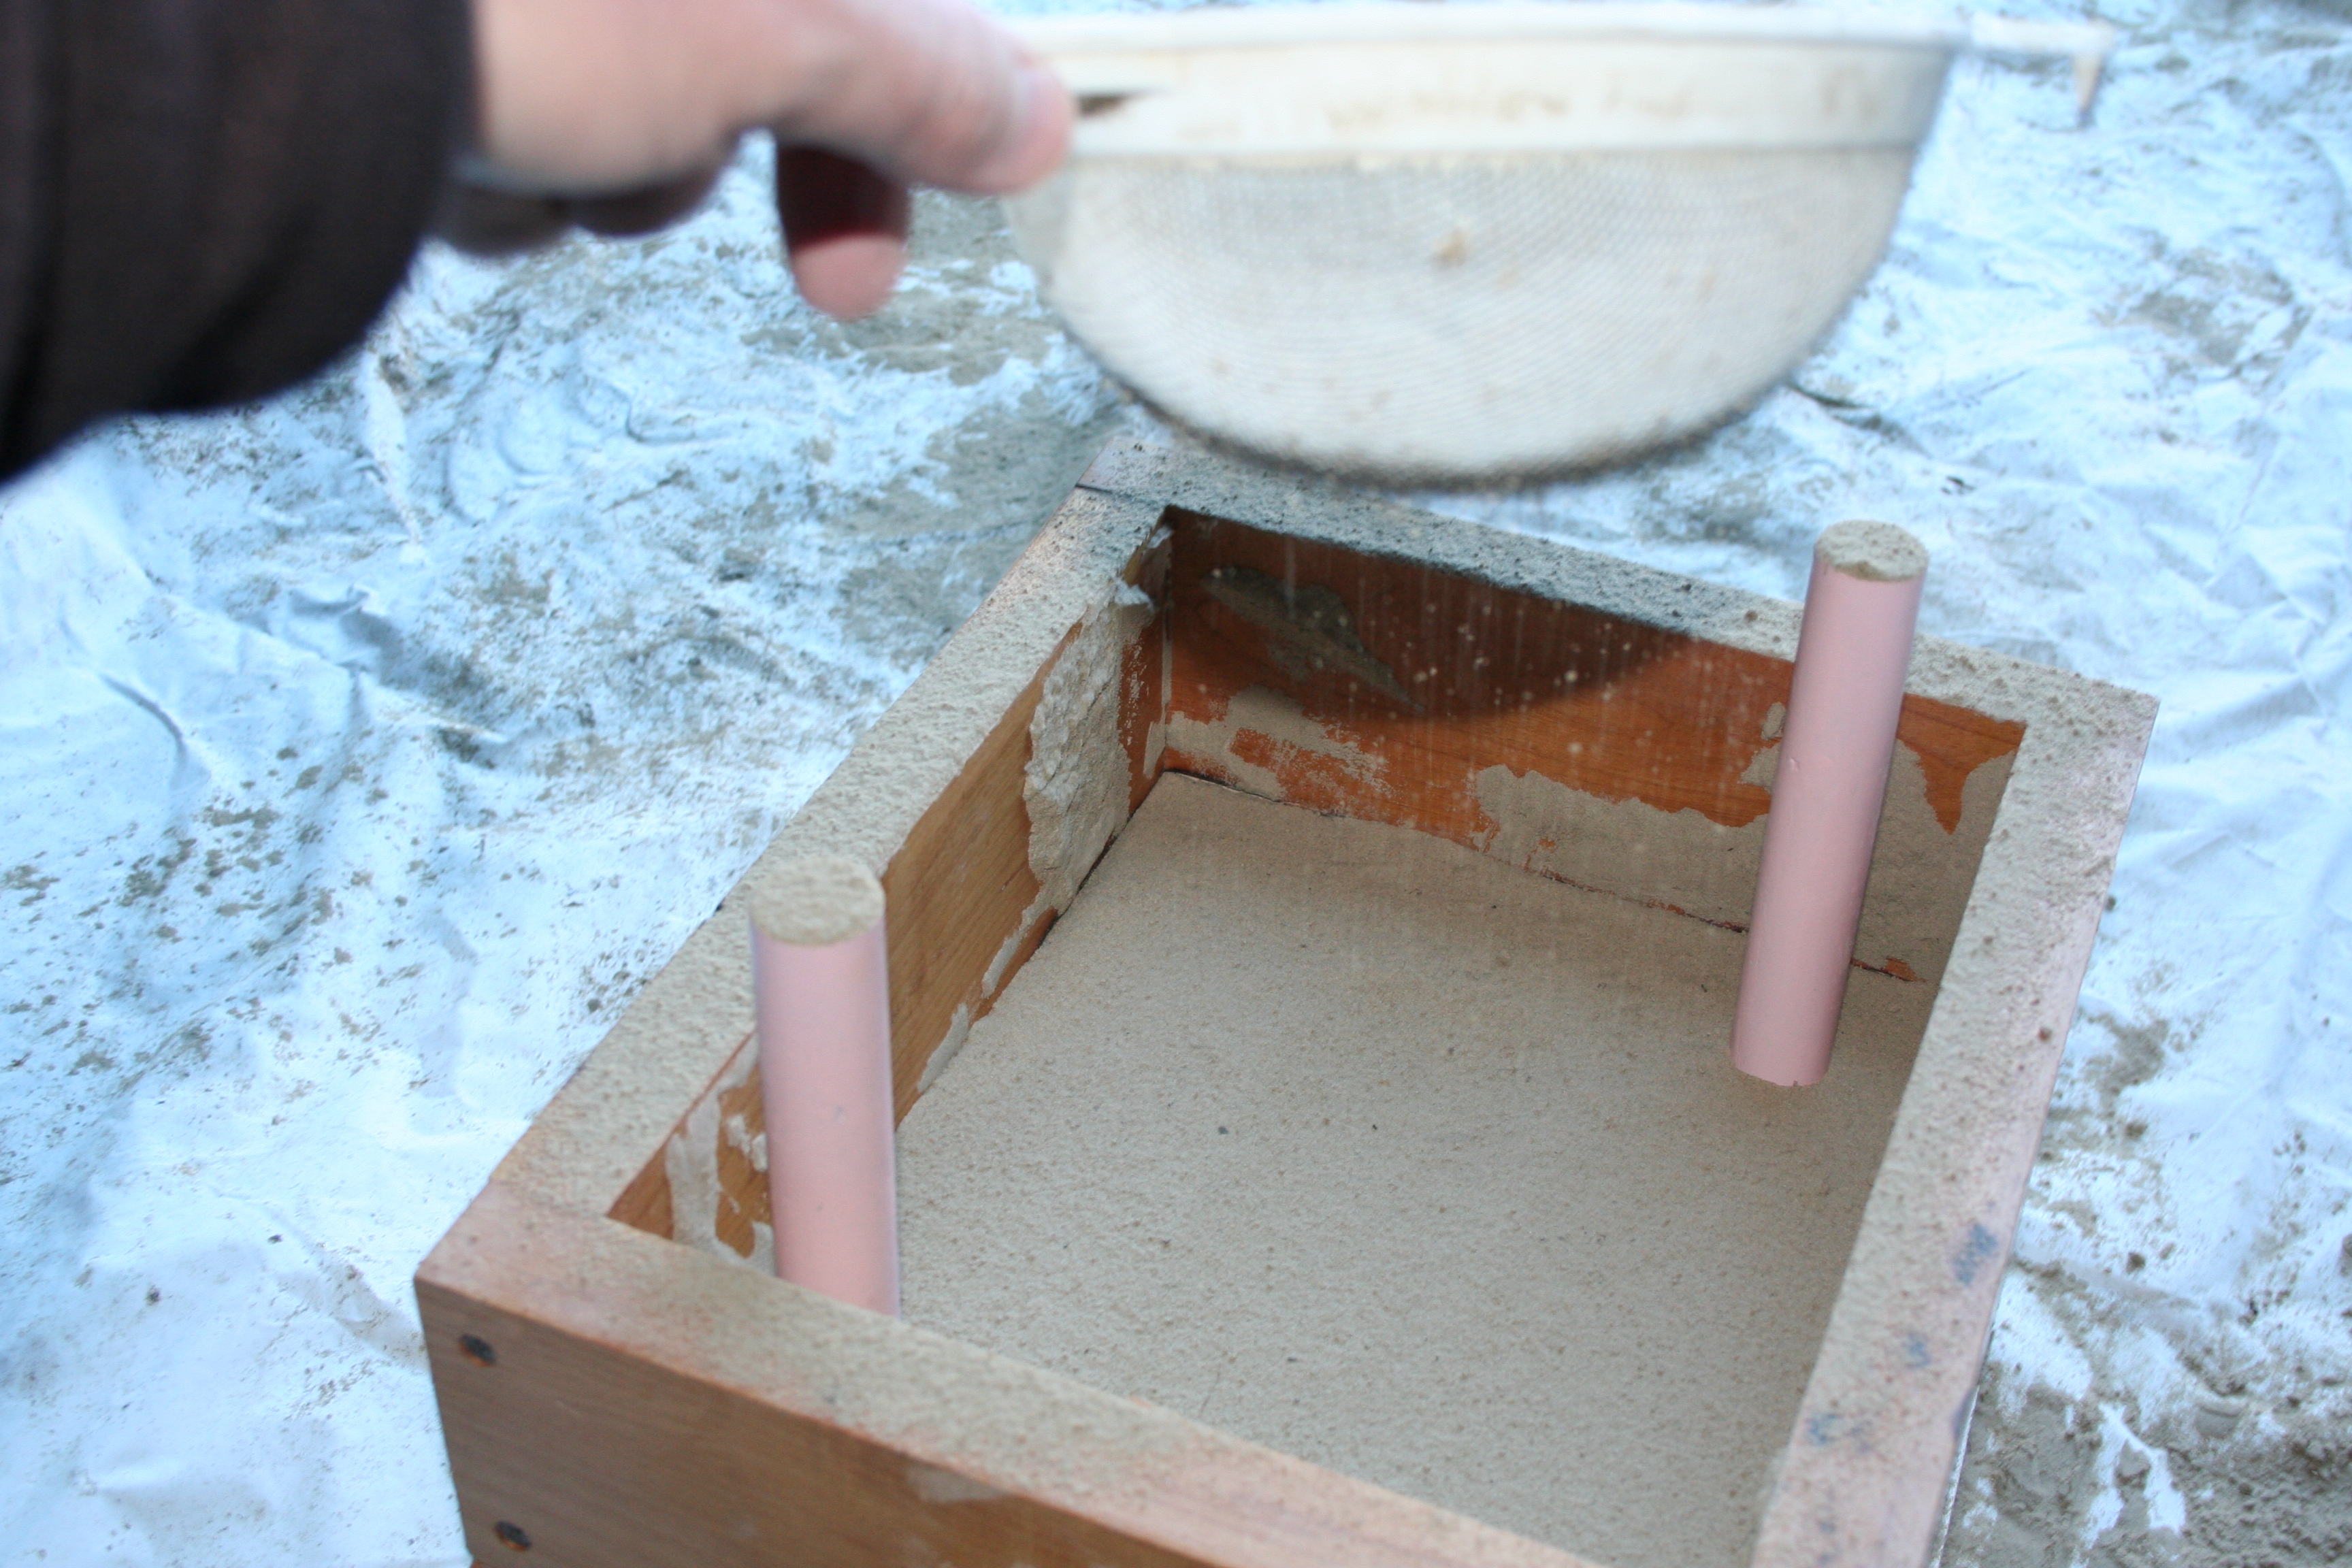
Next I shake sand through a sieve (or “riddle” as it is traditionally called in sand casting) so that I have nice non-clumpy sand all over the bottom side of the pattern.

I then fill up the drag with sand and pound it down with a block of wood (or “ram” as it is traditionally called in sand casting.)

I then use the block to smooth out the bottom of the drag:

I put a second flat board onto what will be the bottom of the drag, roll the mold over, and remove the board from what is now the top of the drag. The edges of the mold are likely to break so I go over them lightly with a brush; when the resulting tiny hole fills in with aluminum it will be easily removed with a file when the casting cools.

Next I put the cope on top of the drag. Notice that the cope and drag have a locator built into the front so that I am more likely to align them precisely to each other. I have a sock full of talc that I dust the top of the drag with, so that when I fill the cope with sand, I’ll be able to get it back apart again to take out the pattern. (Talc is not ideal because it absorbs water. Ideally you want something like graphite or coal dust that repels water, but talc will do.)

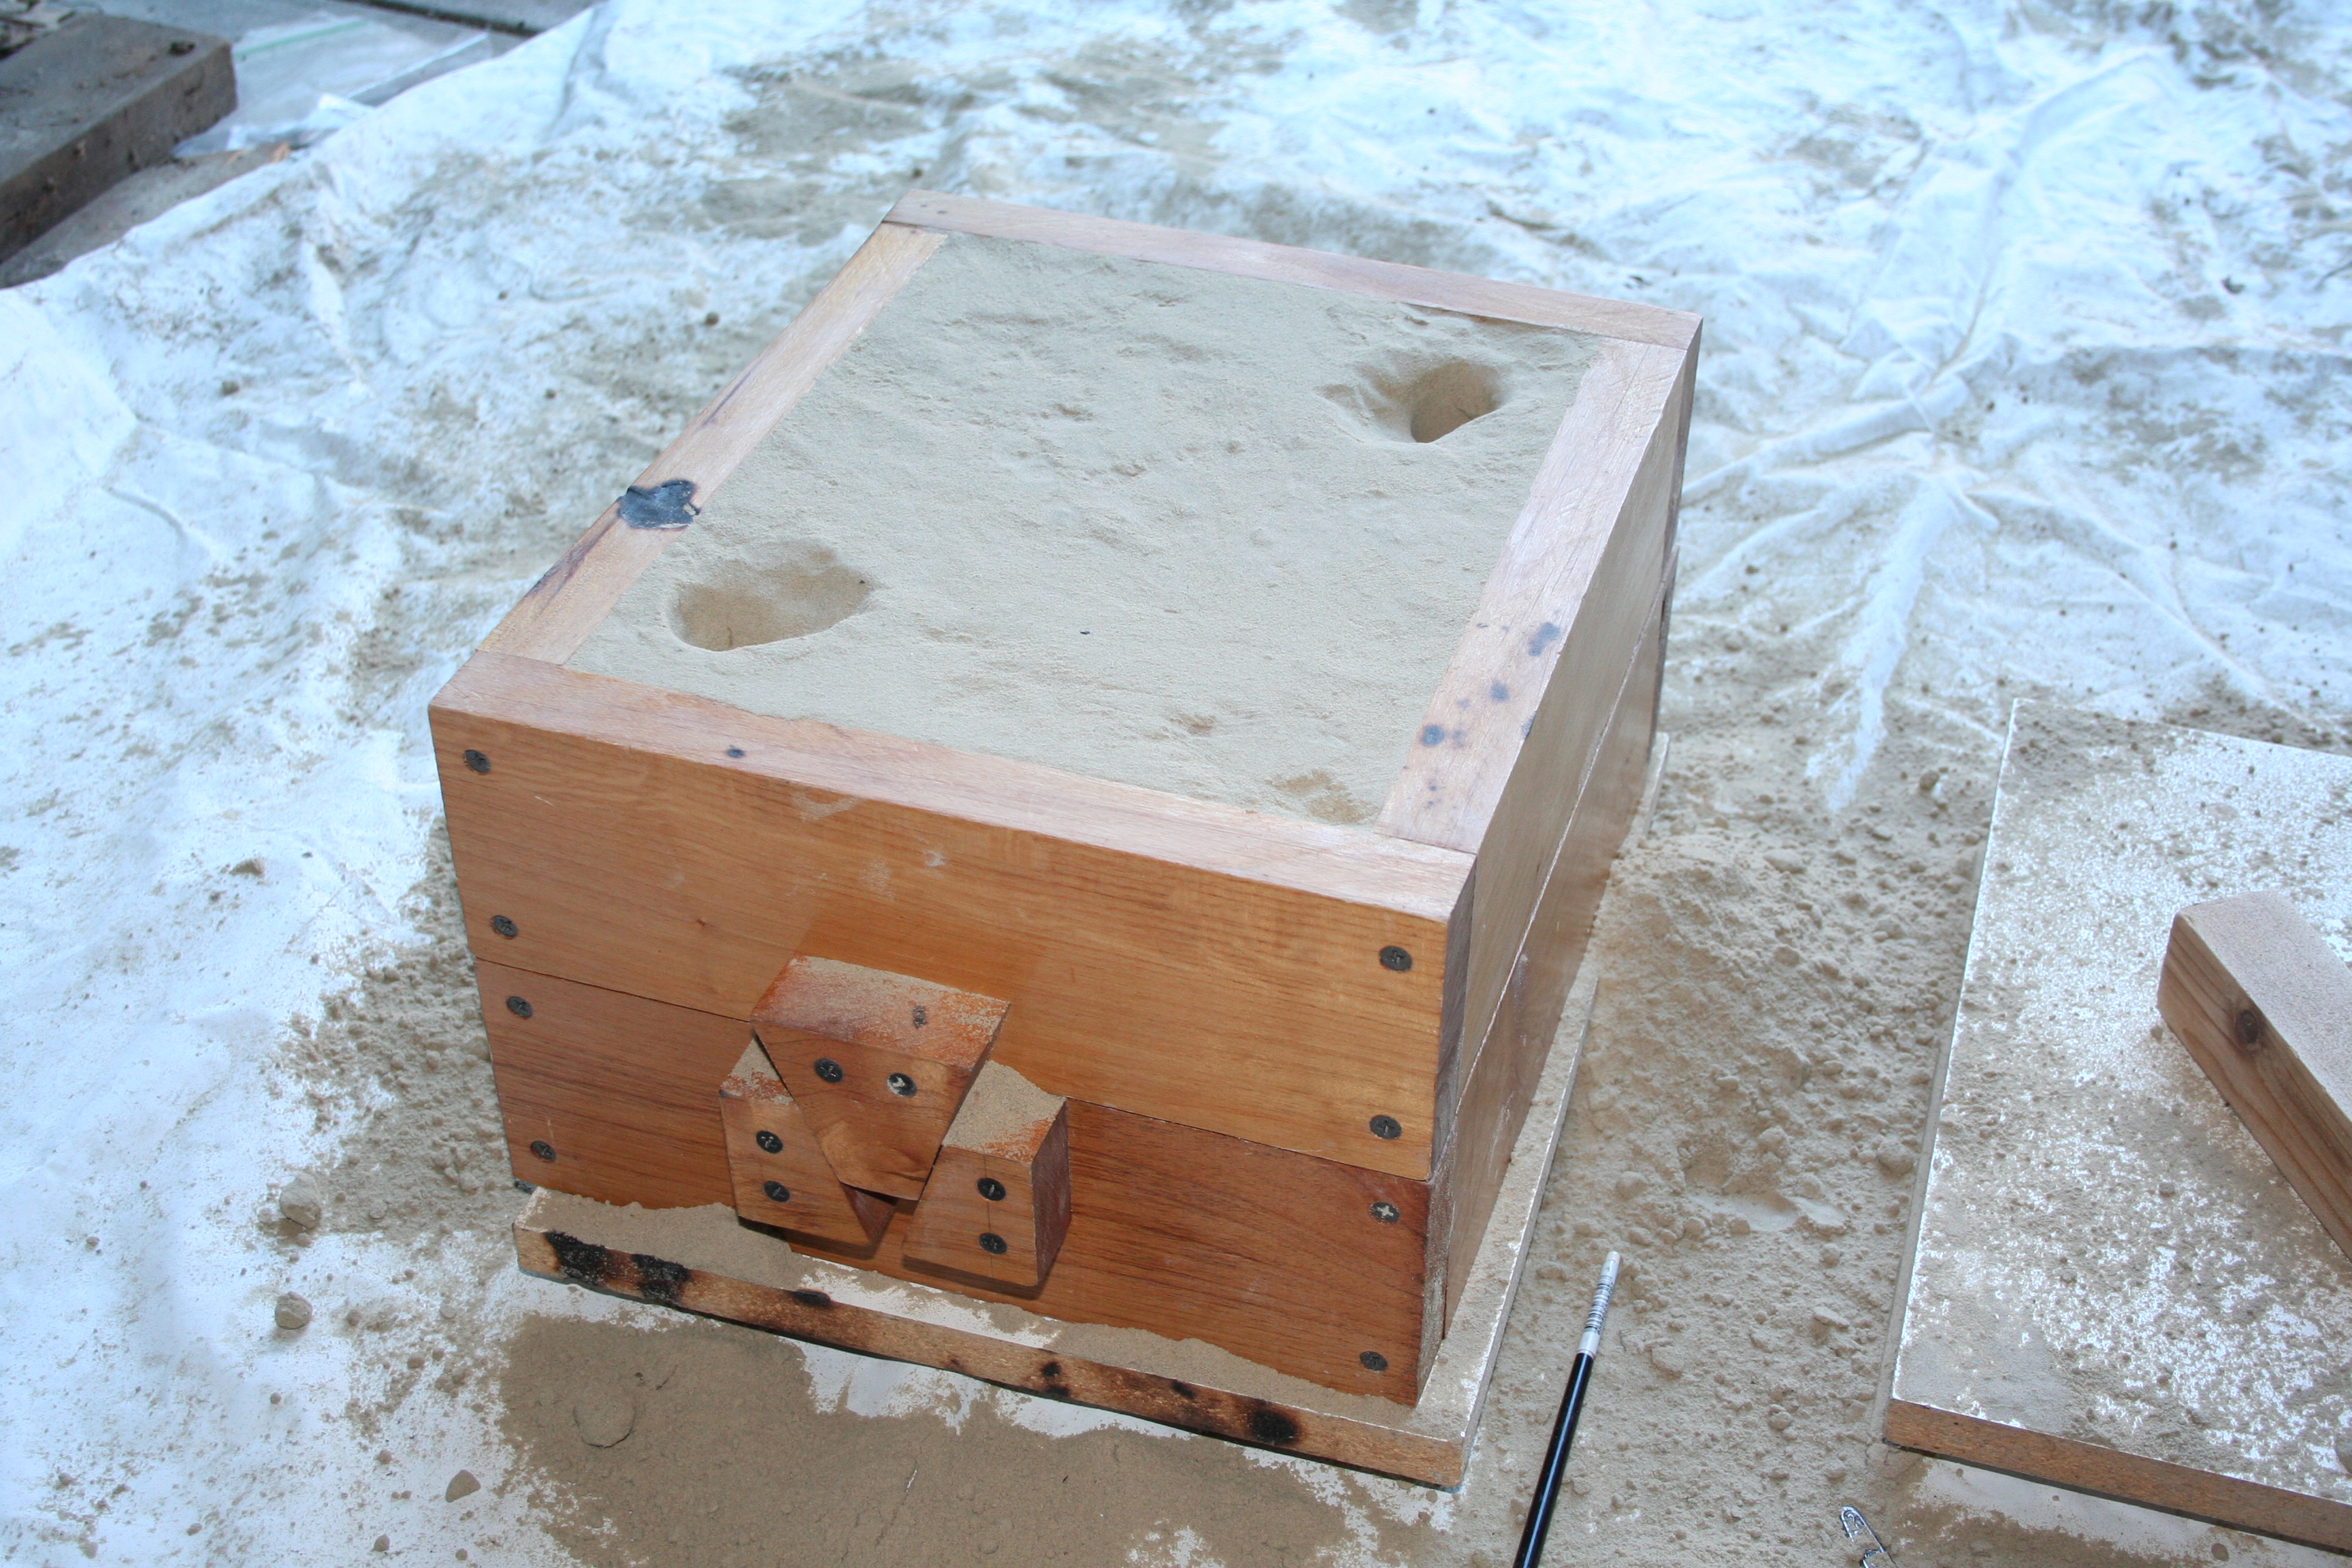
Next I put in two pieces of dowel to make a “sprue” — the channel through which the aluminum enters the mold — and a “riser”. The idea of the riser is (1) when it fills, I know I’m done pouring, (2) it allows air to leave the mold cavity even if the sprue is choked with metal, and (3) it provides a reservoir of molten metal; the metal will shrink as it cools and I want the resulting gap to be filled in by the metal still in the sprue and riser.

Next I again riddle fine sand over the pattern:
and fill in the cope with sand, which is then rammed down and struck flat. I carve funnels into the sprue and riser — into the sprue so that it is easier to pour, and into the riser so that there is extra weight of metal in the riser. I’m just going to melt the sprue and riser again the next time I do a casting so there’s no waste here.

I pull out the sprue and riser pins and (not shown) I stick a piece of stiff wire down through the sand to the pattern, to make an extra small vent for air and steam to escape the mold.
Now I’m ready to separate the flask again to remove the pattern. I enlarge the bottoms of the sprue and riser holes in the drag and cut channels (or “gates”) from the pattern to the sprue and riser. Notice that the pattern has small holes in the top; I tap the pattern with a block to slightly enlarge its cavity, put cup hooks in the holes, and carefully lift the pattern out. The two halves of the flask are then put back together, and the mold is ready to take the pour.

Next time in this series I’ll talk about how the aluminum is actually melted and poured. I of course always melt more than I need — you don’t want to be short — so the remaining metal goes into a muffin tin to make ingots that can be melted again later. The final result in this case looks like this:

The sprue and riser are cut off at the gates, the edges are filed clean, and I’ve got my casting. Notice that the shrinkage is in the top of the riser, not in the casting itself, which is exactly what I want.

Pingback: Dew Drop – July 29, 2014 (#1824) | Morning Dew
This is very interesting; thanks for posting it. I have heard that mixing molten aluminum and water can cause an explosion. Does the water in the sand create a safety issue?
Steam is 1600 times less dense than water, and aluminum is a thousand degrees f above the boiling point of water, so yes, steam explosions are a safety concern. The sand needs to be wet and packed enough to hold its shape but dry and loose enough that gas can escape through the sand quickly. Venting the mold with a thin wire can help.
I once poured aluminum in a too moist sand and it didn’t explode, but it bubbled quite violently so it ruined the casting.
I’m probably sure you’ve already seen this, but if not, it is a treat:
https://www.youtube.com/user/myfordboy/videos
This guy knows what he’s doing, his videos are mesmerizing, and no annoying soliloquies.
(“I’m probably sure” is a new language construct in a new school of thought (or not) that I’m currently probably thinking.)
I am a big fan, and I watched all those videos before trying my first casting. Good stuff.
Brings back fond memories of metal shop in high school – did quite a bit of Al casting back then, haven’t done it since.
Yeah, same. We used basically the same technique, although from the look of it, a lot less care and attention to detail.
I read the title thinking this was going to be a blog about incorrect casts in C#, and the example you were going to use was casting ‘green sand’ to a ‘mold’ object… I need get out more!
Pingback: Melting aluminum | Fabulous adventures in coding
This is a fascinating walkthrough of the green sand molding process! I appreciate the way you demystified what can often feel like an intimidating topic. Your step-by-step breakdown and emphasis on precision, such as the importance of packing the sand tightly and the use of proper gating to minimize defects, really highlight your deep understanding of the craft.
I’m curious, though—when experimenting with different types of sand or binders, have you found any specific combinations that work better for fine details or challenging geometries? For someone just starting with green sand casting, would you recommend focusing on a particular type of project to master the basics?
https://www.richlandsiding.com/